
Plumbing a tankless water heater is not the same as connecting a traditional tank unit. Unlike conventional tank units, tankless systems heat water on demand, meaning the plumbing layout, flow requirements, and safety components must be precisely installed to prevent leaks, inefficiency, or system damage. When installed properly, it can deliver endless hot water, save space, and help many homeowners reduce water and energy waste over time.
In this guide, you will learn exactly how to plumb a tankless water heater, what tools and materials are required, common mistakes to avoid, and when it makes sense to call a licensed plumber for professional tankless water heater installation services.
Is Plumbing a Tankless Water Heater a DIY Project?
Before touching any pipes, it is important to understand whether plumbing a tankless water heater unit is realistic for your skill level. Most people underestimate how precise tankless plumbing needs to be. Unlike tank water heaters, tankless systems rely on exact flow rates and proper pressure management to heat water efficiently.
Plumbing work itself may be manageable for experienced DIY homeowners, but tankless installs usually involve more than just water pipes. Gas line sizing, electrical work, pressure relief valve placement, expansion tanks, and proper venting all play a role in whether the system operates safely and reliably for many years.
For homeowners with plumbing experience and access to permits and inspections, DIY plumbing may be possible. However, if your project requires gas line upgrades, new venting, or changes to local codes, working with a licensed plumber is often the safest option.
DIY vs Professional Installation Comparison
| Factor | DIY Plumbing | Professional Plumber |
| Water line connections | Possible with experience | Included |
| Gas supply sizing | Often risky | Properly calculated |
| Local code compliance | Easy to miss | Handled correctly |
| Warranty protection | Sometimes voided | Usually protected |
| Long-term reliability | Depends on skill | High confidence |
Tools and Materials Needed Before You Start
Before you begin, make sure you have everything ready. Most tankless water heater manufacturers require specific fittings and valve kits to meet safety and maintenance standards. Always check your unit’s installation manual before purchasing parts.
Required Plumbing Tools
Before connecting any water pipes, you should have a complete set of plumbing tools available. Here are the tools to help you ensure clean cuts, secure fittings, and proper mounting:
- Pipe cutter (PEX or copper)
- Adjustable wrenches
- Channel-lock pliers
- Drill and wall anchors
- Level and measuring tape
- Teflon tape and pipe sealant
- Bucket and towels for drainage
Required Plumbing Parts
Tankless water heater plumbing requires more components than most tank systems. These parts protect the unit, simplify maintenance, and prevent leaks:
- Isolation valve kit (hot and cold)
- Shutoff valves
- Pressure relief valve
- Expansion tank (if required by local codes)
- Approved pipe fittings
- Mounting brackets
- Check valve (for closed systems)
Installing isolation valves also makes routine maintenance easier. Regular flushing helps prevent mineral buildup and keeps your system running efficiently. You can learn more in our guide on how to flush a tankless water heater.
Understanding Tankless Water Heater Plumbing Layout
Before connecting any pipes, it helps to understand how tankless water heaters are designed to move water through the system. Tankless units have clearly labeled cold water inlets and hot water outlets. Reversing these connections can damage the heater and create safety risks.
The layout should also allow easy access to isolation valves, pressure relief valves, and flush ports. These components are essential for maintenance, descaling, and preventing reduced efficiency over time.
Hot and Cold Water Line Configuration
Cold water enters the tankless heater through the cold water line, where it is heated instantly before exiting through the hot outlet. The piping must be sized correctly to support the desired temperature and flow rate, especially when multiple showers or faucets are used at once.
Placement of Isolation Valves and Flush Ports
Isolation valves are required for most tankless installations. These valves allow the system to be shut off and flushed during maintenance without shutting down the entire house water supply. Without them, servicing the heater becomes difficult and expensive.
Step-by-Step: How to Plumb a Tankless Water Heater
This section walks through the actual plumbing process. These steps focus on water connections only, but you should always consider how gas, electricity, and venting affect the overall installation.
Step 1 – Shut Off Water and Drain Existing Lines
Start by shutting off the main water supply to the house. Open a faucet to relieve pressure and drain any remaining water from the pipes. This step prevents leaks and makes cutting pipes safer.
Step 2 – Mount the Tankless Water Heater
Tankless units are wall-mounted to save space. Make sure the wall can support the weight of the heater and that the unit is level. Proper mounting ensures accurate flow sensing and long-term stability.
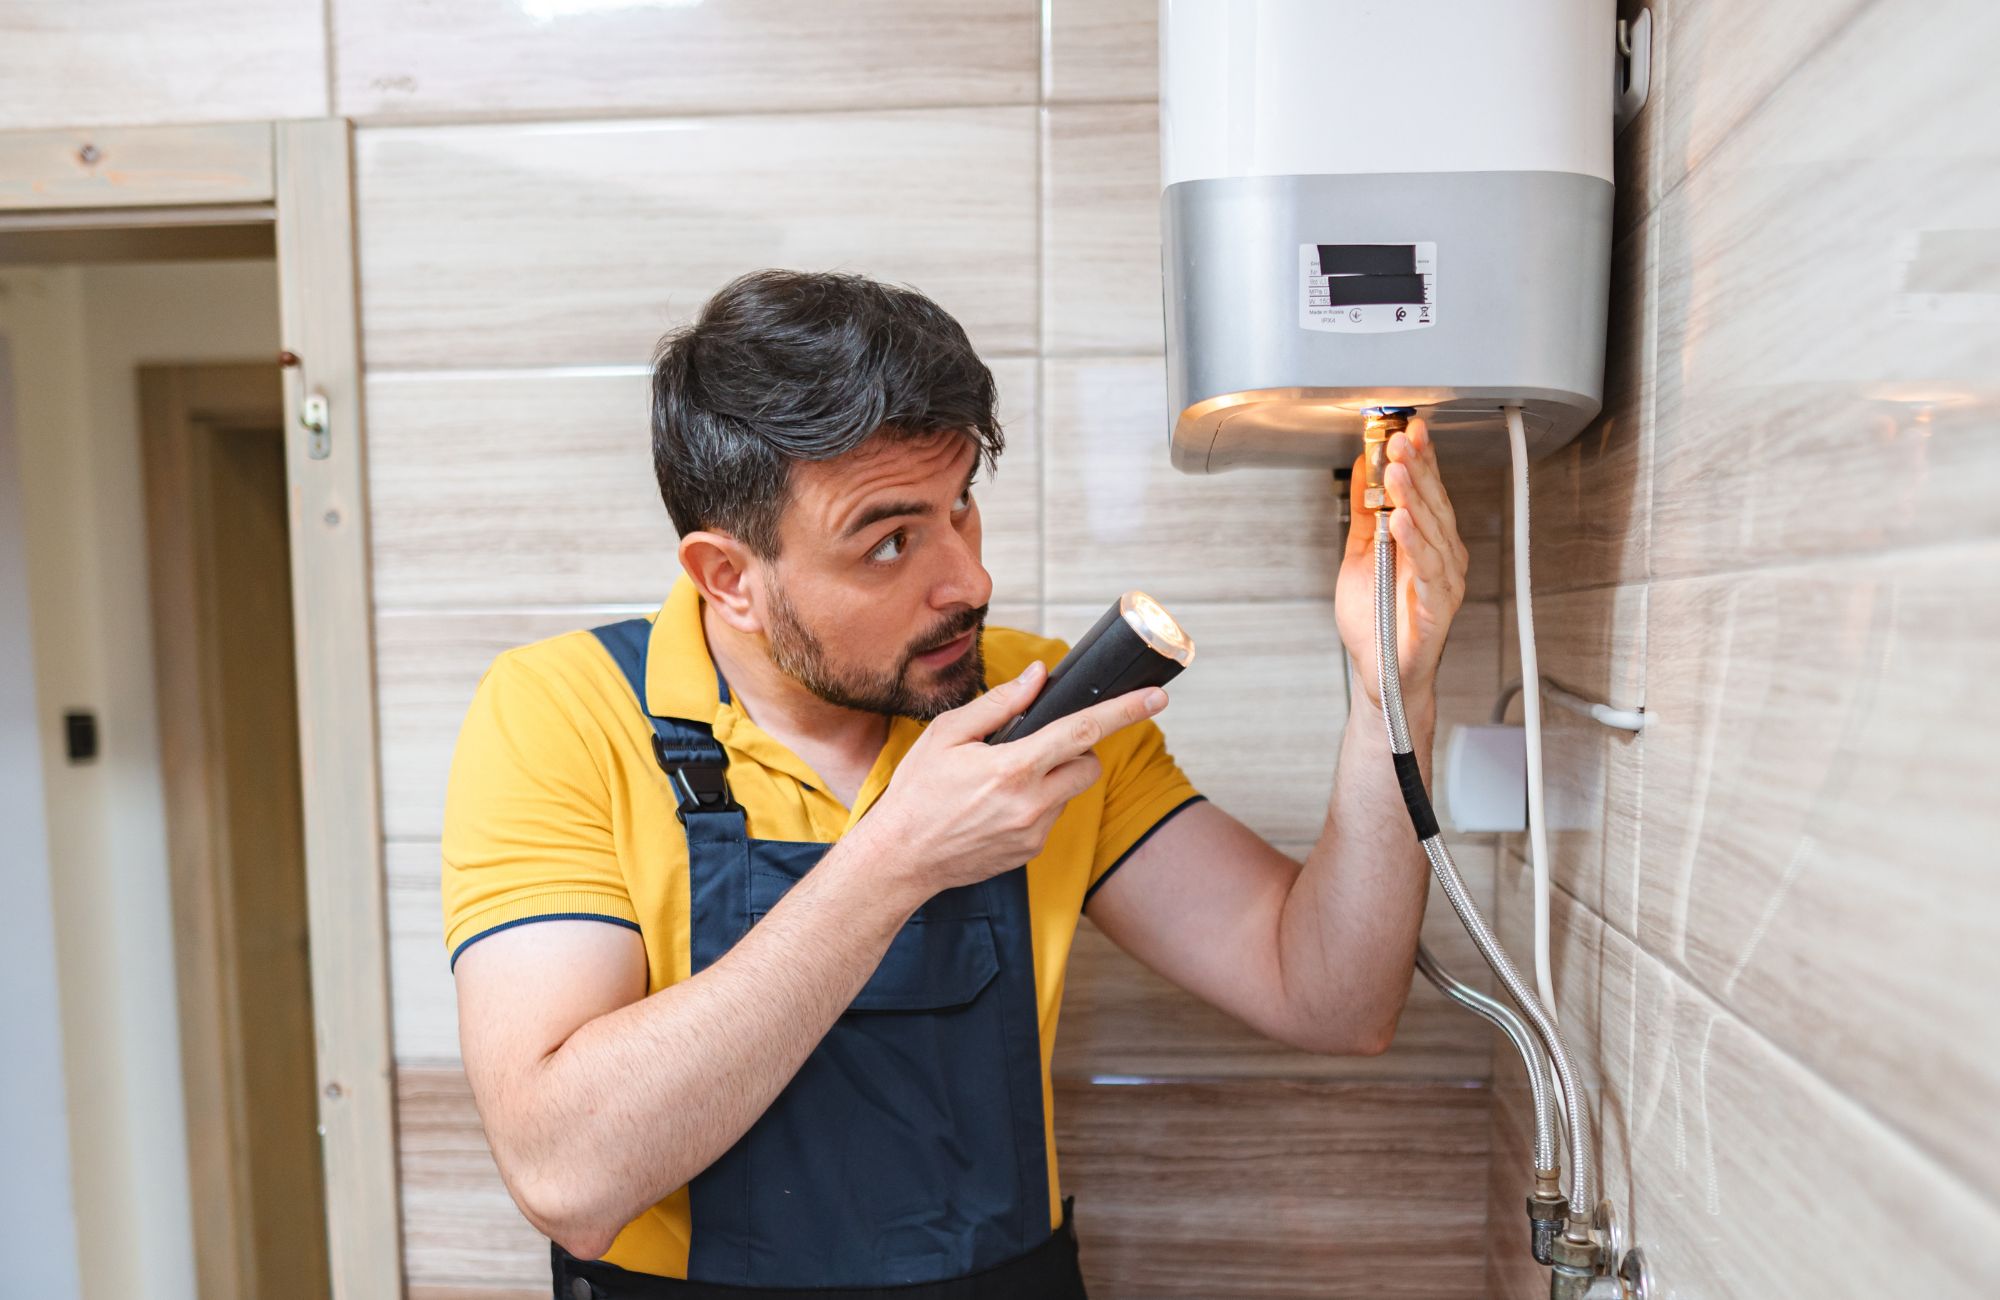
Step 3 – Install Shutoff and Isolation Valves
Install shutoff valves on both the cold water line and hot water outlet. Isolation valve kits typically include service ports used for flushing the system during maintenance. These valves protect the heater and simplify future servicing.
Step 4 – Connect the Cold Water Supply Line
Connect the cold water line to the heater’s inlet using approved fittings. Many tankless manufacturers require copper or stainless steel connections close to the unit, even if PEX is used elsewhere in the house.
Step 5 – Connect the Hot Water Output Line
Attach the hot water outlet line, ensuring all fittings are tight and aligned properly. This line delivers heated water to the rest of the house, so secure connections are essential to prevent leaks.
Step 6 – Install an Expansion Tank (If Required)
In closed plumbing systems, an expansion tank absorbs pressure caused by heating water. Many local codes require expansion tanks to protect pipes and fixtures from pressure damage.
Step 7 – Pressure Test and Check for Leaks
Once connections are complete, slowly restore water pressure and inspect every joint. Check for leaks, unusual noises, or pressure issues before proceeding with gas or electrical work.
Plumbing Code, Permits, and Inspection Requirements
Most tankless water heater installations require permits. Local building codes exist to protect homeowners from unsafe gas supply, improper venting, and plumbing failures. Inspections verify that pressure relief valves, expansion tanks, and pipe sizing meet code standards. Skipping permits can lead to fines, failed inspections, or voided warranties.
Common Tankless Water Heater Plumbing Mistakes to Avoid
Many problems stem from small mistakes made during installation. Avoiding these issues can protect your investment and extend the life of your system.
- Skipping isolation valves
- Incorrect pipe sizing
- Poor mounting location
- Ignoring hard water conditions
- Failing to test for leaks
If any of these issues occur during installation, contacting an emergency plumber can help prevent water damage or system failure.
Conclusion
Learning how to plumb a tankless water heater correctly is essential for performance, safety, and long-term reliability. While the plumbing process itself may seem manageable, tankless systems require careful planning, proper fittings, and attention to local codes.
Planning a tankless water heater installation? Prestige Water Group provides professional tankless water heater plumbing and installation services across Northern New Jersey. Our licensed plumbers handle water line connections, gas supply upgrades, proper venting, and code-compliant installations to help your system run safely and efficiently. Contact us and schedule your service today!
FAQs
How do you plumb a tankless water heater properly?
Plumbing a tankless water heater involves connecting cold and hot water lines using approved fittings, installing isolation valves, and ensuring pressure control with a relief valve or expansion tank. All connections must meet manufacturer guidelines and local codes to prevent leaks and reduce efficiency.
Can I plumb a tankless water heater myself?
Some homeowners can handle the plumbing portion if they have experience. However, most tankless installations also involve gas supply, venting, and electrical work, which often require licensed professionals and permits.
Do tankless water heaters need an expansion tank?
In closed plumbing systems, an expansion tank is often required by local codes. It helps manage pressure buildup when heating water and protects pipes, valves, and fixtures.
How do you plumb in a tankless water heater for multiple showers?
Proper pipe sizing is critical. Larger diameter water pipes may be needed to supply enough hot water for multiple outlets without pressure loss.
How do you plumb a Titan N-120 tankless water heater?
Plumbing a Titan N-120 follows the same principles as other tankless units. Always follow the manufacturer’s installation manual for pipe materials, valve placement, and safety requirements.